The Museum of Freedom is a building within Concord in 2287.
Background
The Museum of Freedom is a history museum dedicated to American conflicts, such as the American Revolution. At one point, an exhibit on the Battle of Anchorage was planned but ultimately canceled due to a limited budget. When the Great War occurred, most of the staff fled the museum, with the exception of Megan Hayes. A Vertibird also crashed on the roof as a result of an EMP, with the surviving soldiers abandoning the wreck and a suit of power armor.
In 2287, a group of wastelanders led by Preston Garvey were traveling through Concord when they were attacked by a group of raiders led by Gristle. The wastelanders had no choice but to take refuge in the Museum of Freedom.
Layout
First floor
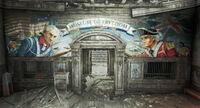
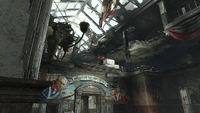
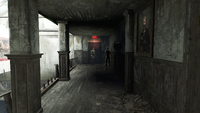
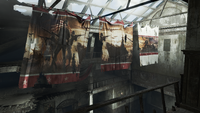
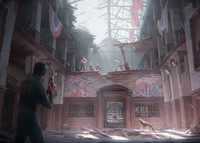
From the main entrance, one enters into a large room. At the far end of the room is a wall an Advanced locked gate and a mural painted across the upper half, looking upwards from here one can see the propeller of the crashed Vertibird. On the right of the room is a corridor leading to the American Revolutionary War display. Upon entering the corridor the lights will switch on and the demonstrations audio track will begin.
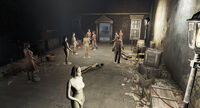
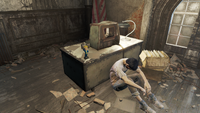
Passing through corridor leads to a mannequin-filled American Revolution display, the mannequins facing towards the northwest of the room depict civilians facing English soldiers towards the southeast. The following room is dressed as a ship's deck with crates strewn across the room and a partial ship's mast, roughly central in the room. The final room before coming out behind the mural is lined with empty display cases and single mannequin fallen against the radiator.
On re-entering the room from the other side of the mural the floor in the center of the room has collapsed leading down to the basement. Going down to the basement via the hole leads to a generator room with a Novice locked door and connected terminal. Behind this door is a fusion core. Turning right then following the left-hand wall of the generator room one will find a toolbox and a Cabinet. On the right is a stairwell leading back up to the first floor. From here take the stairs opposite the locked gate up to the second floor.
Second floor
The stairwell splits against the back wall to the southwest and the northeast. If one takes the southeast stairwell there is a barricade partially blocking the top, behind the barricade is a crate with a bag of cement resting on top. If one turns to the northwest from here they can walk along the balcony to the front of the building. There are two rooms on this side of the floor and a foyer between them.
The room in the southeast corner contains two desks, two wooden filing cabinets, an ammunition box and a chem cooler. The room in the northwest corner contains 3 fallen mannequins in the corner, two filing cabinets and a desk with a caps stash sat on top of it. Just before the foyer is a walkway above the mural to the other side of the floor.
If one takes the northeast stairwell instead and turns left at the top they will be on the balcony on the opposite side of the floor. There are two doors on the northeast wall, one leads into the Anchorage exhibit.
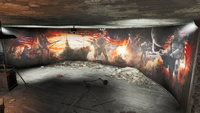
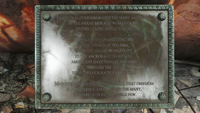
On entering the room to the exhibit, turn left and one will see the beginning of the Anchorage mural on the curved wall, with a plaque on the podium at the center. As one approaches the mural, the room opens out on the right into the main room. In the center of the room is another ammunition box and a duffle bag. The northeast wall has collapsed, allowing passage to the corridor beyond. If one turns left at the end of the passage they will see a door directly in front, leading out to the main room. The floor below has collapsed, hugging the wall to the east of the door will allow one to return to the balcony or one can drop down to return to the entrance; alternatively, there is a stairwell on the right, leading up to the third floor.
Third floor
On reaching the third floor there is a Nuka-Cola fridge and a standard refrigerator directly in front of the Sole Survivor. To the left there is a table and two chairs in the corner, but nothing of note. To the right of the stairwell, however, leads to a corridor with two doors on either side. The southwest doors lead out onto the second-floor balcony, the northeast doors lead into the offices. The wall between these two rooms has collapsed, essentially making them into a large single room. Both rooms contain desks and filing cabinets, however, the southeastern room also contains two caps stashes; one is next to the desk by the fallen diving wall and the other between the filing cabinets by the southeastern door.
If one takes either of the doors out onto the second-floor balcony there is a door to the northwest which Preston Garvey and the Quincy refugees have locked shut. When entering the museum for the first time, two raiders can be found kicking on the door and threatening the room's occupants. After a brief conversation, the raiders will give up on the door and head towards the stairwell. As with the first-floor balcony, there was originally a path across the center of the room to the other side, but this has collapsed, leaving access to the far side accessible through the locked office.
Upon entering the office, one is confronted by a desk and Novice locked terminal, which Sturges is using. The Atomic Command issue of RobCo Fun magazine is also on the desk, next to the terminal. If one turns to the southwest there is a couch which Mama Murphy is sat on. Marcy Long can be seen pacing the breadth of the room and by the desk in the western corner Jun Long is sat on the floor; on the desk, itself is the perception bobblehead. the door on the northwest wall leads out to the external balcony, where Preston was first seen firing at the raiders in Concord below, the southwest door leads out onto the balcony.
On re-entering the balcony on the southwest side there is a room with a two collapsed walls opposite, with two filing cabinets and a desk; to the right of the door is a small room with two selves, a desk, a filing cabinet and a refrigerator. If one heads southeast along the balcony they will reach the door to the rooftop.
Rooftop
Upon exiting the museum onto the rooftop there is a desk with SSG Micheal Daly's log and a toolbox sat on top. There is also a caps stash on the floor next to it. To the right of the desk is the crashed Vertibird and a complete suit of T-45 power armor, less the fusion core to operate it. Inside the Vertibird is the minigun and if one passes through the Vertibird a stool and toolbox can be found along with several junk items. At the far end of the roof, the wall has collapsed, allowing one to drop back to the ground.
Intercom quotes
- "No more British occupation!"

- "Join - or die!"

- "Back to England with you!"

- "You lobster-backed knaves!"

- "By the Crown - Back to your homes!"

- "Boston belongs to America!"

- "Remember, lads. Two if by sea."

- "Come on, Dawes! We ride to Lexington to warn Hancock and Adams."

- "Awake, men of Middlesex! The King's regulars are coming out!"

- "Have your tea back, you jackanapes!"

- "No taxation without representation!"

- "Let's send these crates back to London, boys!"

Plaque
Inhabitants
Notable loot
- Fusion core in the basement. This fusion core will only have about a 50% charge level in it, as opposed to the 100% charge level in most other fusion cores.
- Perception bobblehead, on the table behind Preston Garvey.
- A copy of RobCo Fun with the Atomic Command mini-game holotape on the desk to the right in the same room as the bobblehead.
- A T-45 power armor frame, on the roof of the building next to the Vertibird. Requires a fusion core.
- Minigun, on the same roof, mounted onto a crashed Vertibird, which can be ripped off using power armor.
- Log - SSG Michael Daly on the same roof, on the desk behind the power armor.
Related quests
- When Freedom Calls - The Sole Survivor helps Preston Garvey and his friends to escape from a band of raiders.
Notes
- Also depicted in the mural is the USS Missouri, a United States Navy battleship (with the configuration of the afterward Montana-class battleship) that served in the Pacific Theater of World War II, the M46 Patton, a tank used by the United States during the early stages of the Cold War in the real world, what appears to be a Sikorsky H-19 utility helicopter can be seen behind, the Royal Aircraft Factory S.E.5 biplane used by the American Expeditionary Forces in Europe during World War I, the Tank Mark VIII, also used in World War I, the Consolidated B-24 Liberator, the Douglas A-20 Havoc (also known as Boston Mk.I) and the Boeing B-29 Superfortress which were flown in World War II, plus several Stingray Deluxes. The weapons held by the soldiers include a M1 Garand, M1 carbine and an M1918 Browning automatic rifle.
- Several low level raiders may be present when fast traveling to this location and become immediately aggressive.
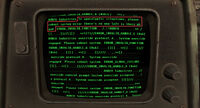
- The terminal that Sturges is using upon the player character's arrival has lines of text scrolling upwards on it when not in use by the player character. The text is mainly comprised of general RobCo terminal error messages, but some snippets include cryptic messages such as "///// Please save_yourselves," "////ERROR_ITS_THE_END_6" and "ROBCO Industries in apocalyptic situations, please reboot system error there's no one left is there oh god."
- Entering the T-45 power armor frame found on the roof of the museum doesn't seem to trigger the "//companion// disliked that" message when exploring with Strong.
- The map of the Concord Church is included in the museum's local map.
- There is an inaccessible section of the musuem behind the wall on the southeastern side of the building.
Appearances
The Museum of Freedom appears only in Fallout 4.
Bugs
- When fast traveling to the Museum of Freedom, companions may spawn standing on the Sole Survivor's head.[verified]
- If one knocks the mannequins down in the American Revolutionary War displays and reloads a save prior this occurring, the mannequins will not reset to their standing position.[verified]
Gallery
| |||||||||||||||||

